
When I was first trying to learn how to use handsaws, I struggled. Even with a properly sharpened saw (and that was really more of a mental block – it’s not that hard to sharpen a passable saw, but you have to be willing to try!) I struggled to cut to a line. It was very frustrating – one quick cut, followed by a lot of fussing with a plane to try to square up the cut. I was missing something – I just didn’t know what.
Off to the books! In Alex Bealer’s Old Ways of Working Wood I found a sketch of a saw bench. It took me a while to find this, as it was in the “bench” chapter and I was of course looking in the “sawing” chapter, as I had no idea that a bench was the key. Slowly it dawned on me, the workbench that I had so painstakingly made, the centerpiece of my shop, was not going to be able to help me saw better. In fact, it was working against me. With a board in the vice, my posture and the angle of the saw to the cut were wrong (at least for a beginner…). I decided to make my own version of the saw bench I had found in Bealer’s book.
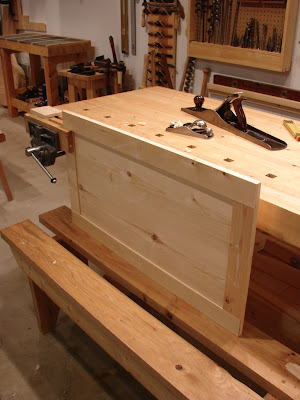
The saw bench I made is sized to me – the perfect height for my knee to hold the stock being cut. This brings my whole body into position…
Click. The door was unlocked! The very first time I used it, my results improved a hundred fold. Soon I was cutting to the line – or even splitting the line, with no planing required (unless I wanted smoother end grain). I found this very, very exciting! It wasn’t, and still isn’t, magic. I need to slow down and pay attention to what my brain, my body, and more importantly, the saw are telling me. But, it was the key I needed. I suppose I may have stuck with it; continued struggling and slowly getting better without the saw bench, but I’m not sure I would have, and I’m glad I didn’t need to.
 The two primary duties of the saw bench: ripping and crosscutting.
Ripping: The length to be ripped off hangs over the right side of the bench as I am right handed. If it is a short rip, I stand at the end of the bench with my right leg on the floor and my left knee bearing on the board. If it is a longer rip, I either stand with my left foot on the floor to the left of the bench and rest my right knee on the board, or I climb up on the bench and kneel on the board with both knees. On occasion, I use the long ripping slot down the center of the bench – usually when the stock is very thin and needs more support.
 Crosscutting: I stand beside the bench at the right end, and the board to be crosscut projects beyond the end of the bench by the amount that needs cutting. I line up the far edge of the board with the long edge of the bench which gives me a stronger visual sense of squareness.
 Once I had the bench, many other uses became apparent. Chief among these is the bench is where I do the majority of my boring work. Working with the brace lower allows me to get over the work and increases efficiency and efficacy. And again, my knee becomes the clamp, unless I choose to straddle the work, in which case my rear becomes the clamp. It also works with its larger cousin to support panels or other larger pieces when I need to plane their edges. Additionally, the saw bench gets pressed into service for assembly purposes – at which time the added convenience of the saw bench having the same height as the seat of my shavehorse really pays off.
 What other keys await?


0 comments:
Post a Comment