The fence work continues...
On to the mortise and tenon joints!
My tool kit for this part included: my new Gramercy holdfasts (thanks sweetie!), mallet, big-boy mortising chisel (almost silly large), smaller chisel for cleaning up the bottom of the mortises, mortise gauge, square, folding rule, knife and my LN dovetail saw. Heres a shot of the bench top after several hours of work. The piece in the center is a combination layout gauge and M&T tester for this project. I tried a new technique for chopping the mortises that I read about a while ago over at Peter Follansbees blog - it worked great. A little too great maybe, as I really got into a groove with the mortising - so much so I forgot to take pictures! About all I can offer is a shot of the tester confirming that the mortises are the correct size and depth.
 I did remember to take some shots of the tenons being marked and cut.


 A final test, and thats one more done...out of 50 total...sigh.
Woodstove Fence Mortise and Tenon Joints
Labels:
Woodworking Projects
Fall Turning Schedule
Labels:
Woodworking Projects
Hi Everyone,
Well Im almost recovered from my strained knee and I can stand and walk around so its time to get back to work.
I have a number of platters and plates that I need to make and I dont think Ive written much about that so Im going to go and dig out some lumber out of my wood pile and start turning. Im also going to make several round cutting boards. This will involve laminating so those of you who are new to Selkie Wood Works can see how this is done.
Ive also been working on spoon carving and I think my design is going to work well. I make my spoons out of kiln dried lumber so the wood is harder than unseasoned tree branches which is what most hand carved spoons are made from. Well talk about tools and technique for this as well.
Im glad Im getting back to work again so grab some coffee and drop by the wood shop. Weve got more adventures ahead.
VW
Read More..
Well Im almost recovered from my strained knee and I can stand and walk around so its time to get back to work.
I have a number of platters and plates that I need to make and I dont think Ive written much about that so Im going to go and dig out some lumber out of my wood pile and start turning. Im also going to make several round cutting boards. This will involve laminating so those of you who are new to Selkie Wood Works can see how this is done.
Ive also been working on spoon carving and I think my design is going to work well. I make my spoons out of kiln dried lumber so the wood is harder than unseasoned tree branches which is what most hand carved spoons are made from. Well talk about tools and technique for this as well.
Im glad Im getting back to work again so grab some coffee and drop by the wood shop. Weve got more adventures ahead.
VW
Shaker Table Part 2
Labels:
Woodworking Projects
Wow! It has been a LONG time since my last update. I guess Christmas and New Years got in the choice there somewhere. I hope everyone had a good Christmas and New Year break as I did.
Ok, so back to this table. Last time I left off I had milled the four leg blanks to size and was getting ready to mill the leg rails. Once I milled up the leg rails, I needed to lay out for the mortise and tenon joins. I probably do things a little different, but thats just the choice I am; I cut my mortises before I do my tenons. I guess the reason I do it this choice is because I have a mortising machine and the chisels are a defined dimension and I can cut the tenons to match this. Also, because the side and back rails are 5" wide, I will be using a haunched tenon in order to add strength to the joint. If I used just one big mortise and tenon, the legs would be very weak because of all the material that would be removed. So, after I laid out how I wanted the mortises to be, I drilled them out with the mortiser and cut the tenons to match.
 |
| From Shaker Table |
After that, I was able to do a dry fit on the table.
 |
| From Shaker Table |
If you notice, I have not cut the tapers on the legs yet; this is done after the mortises are cut so the legs are alchoices flat will doing the mortises. It also serves as a bit of a reference when you do go to cut the tapers because you know to alchoices taper the mortised side. Here, the legs were tapered on the bandsaw and cleaned up with hand planes.
 |
| From Shaker Table |
Now the table frame is ready to be glued up. While that is being done, I can get the drawer runners cut and glued in; nothing special about these, just some pieces that will be glued to the sides and allow the drawer to set on and provide support from the bottom.
Next, its time to turn my attention to the drawer itself, but that is for later.


 Its all the more shameful when compared to my shop paper towel holder. Which, although simple in design and construction, I do notice every time I get a towel from it. Its wood. I made it. It makes me happy. Big, big difference.
  It was time for action.
 After a quick trip to the saw bench, and a few passes of a fore plane, it was time for layout. I used pencil so I could make changes as I went. After the third redo, I liked what I saw.
 The next step was to bore the hole for the rod that will hold the paper towels. I do most of my boring on my low saw bench. The slot down the length of the bench makes supporting the workpiece easy. For the boring, I used my Stanley "Yankee" clone, 12" sweep with a 1 1/4" (marked "20" - as auger bits are numbered in 1/16ths) auger bit. The bigger sweep gives me much more torque. Even in the soft pine, a bit that size has quite a lot of resistance, and although a brace with a shorter sweep would function fine, less effort equals smoother action and less likelihood of tearout on the face from wobble. The trick to avoiding tearout on the back is to not bore all the choice through. As soon as the lead screw breaks through on the other side stop and flip the board. You can reach under to feel for the tip, but after some practice you can just feel it in the brace when the tip breaks free. Its pretty amazing, but that tip can just barely be felt with your finger tip, barely even be seen, but the tool and your body will tell you, if you are listening.
  Side Note: If you dont have a bit this big, expandable bits are useful, but the flipping technique above doesnt really work. Because expandable bits tend to have only one cutting fluke, they dont rotate cleanly once the bit looses the guidance of the lead screw. In this situation, your best approach is to use a piece of scrap wood as a backer and just bore straight through from the front side. I used to put a piece of paper between the two boards to show me when I was completely through (just like a lot of old shop instruction books tell you), but you dont need too. If you pay attention, you can feel the brace tell you when you are in the second piece of wood. Its pretty cool.
 The bowsaw was followed by the spokeshave...
  and the file.
 Next I will use this piece to layout the duplicate bracket for the other end. Then I will need to cut a piece for the top, cut two dadoes in the top, make the rod, attach the brackets to the top and mount the holder under the cabinet.
  I have a gouge that I very much like using for the exterior surfaces of spoons and other things and here is a photo of it. Poor thing is as dull as a tool can get and still be considered a tool:
 I also have a small draw knife that Im partial too. Same dulled edge...gee I wonder who owns these tools...?
 Here is the bowl after several fruitless minutes trying to shape it. I might have done better had a bitten off the corners with my teeth:
 I have a number of carving tools that have curved cutting surfaces that cant be sharpened on a grinding wheel or a flat sharpening stone. A wood carver in England named Sean Hellman has a really good video on sharpening a hook knife, which I have. The video shows a very simple method for sharpening and Im going to post a link to his blog so you can see it too: http://seanhellman.blogspot.com/2012/02/sharpening-mora-164-hook-knife-and-how.html.
 I love oil finishes. They make wood look so beautiful and you can feel the wood with your hands when its finished. There isnt a layer between you and the wooden object. I like to use Tried and True varnish oil. Its linseed oil with a dryer added to it. Linseed oil finishes are an old time type of a finish but the bad part about them is that it can take several weeks to a month for the finish to dry and cure. The dryer in this cut that down to about 24-36 hours.
 Ok, time to oil. This is always my favorite part of any project.
 And here is a photo of the cumaru plate:
 Im going to let both just sit for an hour and then Ill take another look at them and if they need it, Ill rub down the surface to take away any excess oil.
 And I spent a portion of the day re-turning all of the bowls in the drying bag:
 You can see how the bowls in the bottom photo have been rounded and the walls and bottom of the bowls thinned out.
 This bowl is longer than it is tall and it still has the potential to distort while drying so I didnt cut it too much.
 Ok, my next posting is about the spoon Ive begun making so lets go on to part 2.
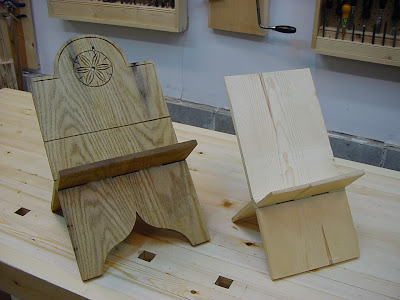


 The photo above shows the bottom of the blank. You can see the purple color and a quilted-looking grain pattern.
 This photo shows the blank from the side. On the left you can see the rudiments of the foot. The sides are roughly parallel with each other. Im going to canter them inwards a couple of degrees towards the foot in just a second:
 You can see above that the sides are sloping inwards towards the center of the piece. Ive also taken a few minutes and used a scraper on the sides to smooth them.
 This are heavy, blunt-ended tools that have a sharp edge that scrapes a surface smooth while its turning on the lathe. The square edged tool on the left is for convex or exterior curved surfaces and the rounded scraper on the right is for interior bowl work. These are made out of heavy, high speed steel so as to maintain a sharp edge and to dampen the vibration that is generated as the piece of wood spins. These tools are very helpful as finish tools and are worth their weight in gold.
 This has produced a lot of purple shavings. Maybe I should put them in a bag and send them to Prince, the rock star who uses the color purple a lot. I bet you didnt know that hes from Minnesota.
 Ok thats that for today.

